• Home
  • About
  • Shop
  • Advertise
facebook twitter instagram pinterest bloglovin Email

Ramblings with Rin


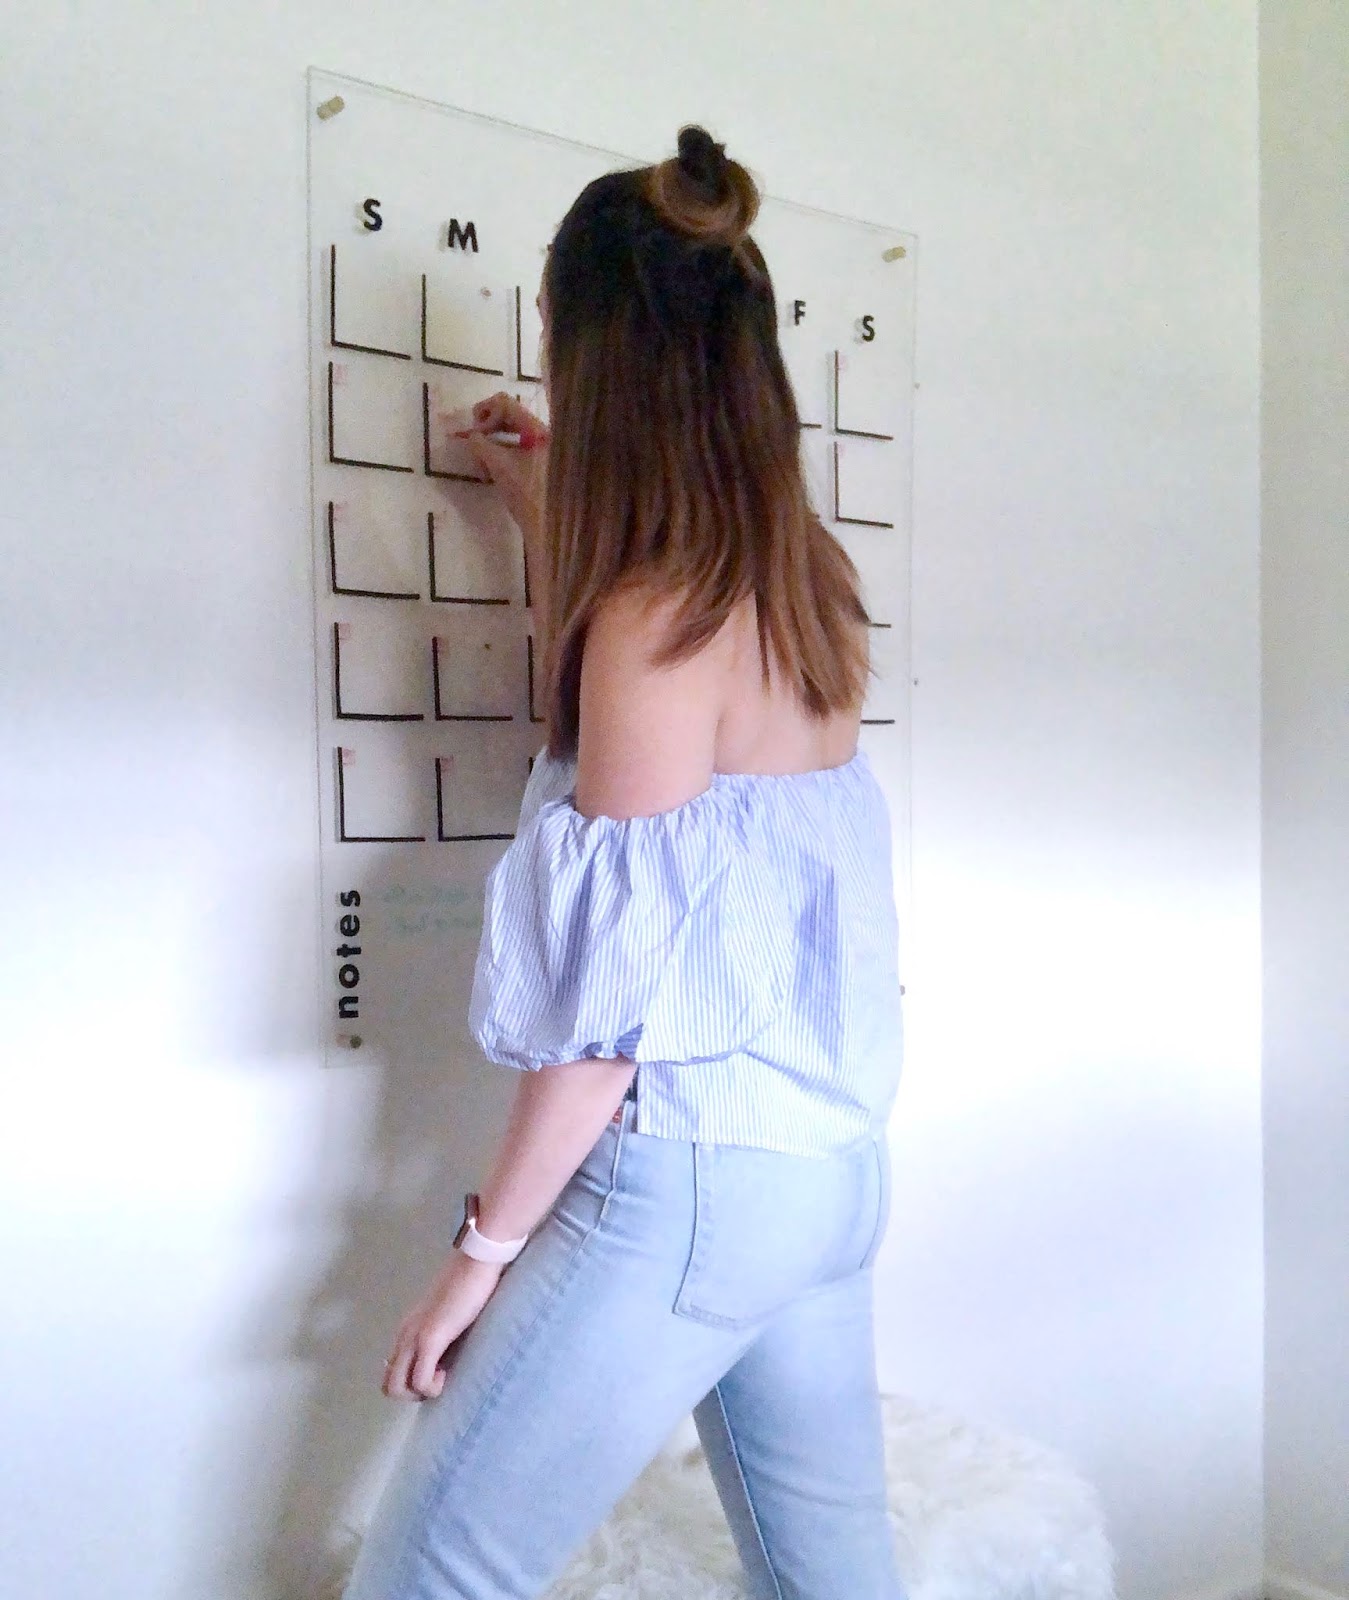
I'm SUPER excited for today's DIY because it is one that's been on my list for a long time. I've had my eye on an oversized clear acrylic calendar for quite some time but could not justify spending $300+ on a cool looking calendar. Since then, I've been sourcing out materials and a plan of attack for making my own DIY Acrylic Calendar. 

I used this A Beautiful Mess tutorial as my starting point and tweak a little based on what I had available. Also, if you aren't a big fan of DIY projects like me but also don't want to pay an arm and a leg for your own, I've got your back. This alternative from Hobby Lobby is just a tad smaller than this but only $60 (but look for coupons before you buy)!


What You Need:
  • 30" x 36" x .220" Acrylic Sheet 
  • Electrical Tape 
  • Scrapbook Letters 
  • Brass Standoffs 


Step One: The first step is drilling the holes in each corner of your sheet. I did mine an inch out from the edge and it was perfect. I followed the tip from the A Beautiful Mess version and used a 1/4" drill bit and drilled in reverse while applying pressure. I did find out after the fact that I need to make the holes bigger to fit the stand offs I linked above. 


Step Two: Cut and layout the vinyl calendar. TBH, this was the most tedious and annoying part for me because I didn't have the luxury of having a custom vinyl maker, so I add libbed by using electrical tape. My calendar squares are approximately 3.5 x 3.5 inches, so I would measure a piece of electrical tape 3.5" long. I would the place the electrical tape on a cutting mat and then using a box cutter, I would cut four evenly spaced stripes. This was the fastest and easiest way I could think to cut these and was able to get in a good groove like this. 

Important note: You will need 70 stripes to complete the square section, and I left approximately 3/4" between squares. 

Step Three: I used the scrapbook letters to create the days of the week and notes section.  

Step Four: Finally, it is time to hang your new calendar. Every standoff kit is different so be sure to follow the instructions on yours to get the best results! 

Now, you can decorate and and starting scheduling your life with dry erase markers in fun colors!


Share
Tweet
Pin
Share
No comments

DIY Pom Pom Earrings

Buckle up, ladies, because I have a fun AND super easy DIY for y'all. I've had my eyes on this projects for quiet some time after seeing this adorable pair from Baublebar. 

Here's the deal; you only need two things and no tools are required. Waiting for the catch? There isn't one. It took under five minutes to make and they are so cute! 

You only need pom poms (I bought mine in a multi pack at Target) and gold hoop earrings (these are from Forever 21). Just poke the pom pom through the hoop and THAT'S IT! 

Told you it was super easy. If you make this DIY for yourself, tag me in the final product over on Instagram (@rinlongo). 
Share
Tweet
Pin
Share
No comments

If there is one thing that will always be true about me, I love a good DIY project. It has been almost a full year since I purchased my first home (crazy!), but I am still finding myself in constant home renovations. While I was looking for home inspo on Pinterest, I found this killer neon light/wallpaper combo. I thought it would be perfect for my home office and set out to find an affordable way to make it myself. 


WHAT YOU'LL NEED:

  • EL Wire (I used 9 ft)
  • Chalk 
  • Drill
  • Wood or Drywall Sheet 
  • Shower Curtain (or fabric)
  • Hot Glue or Super Glue 

The best part of this DIY is it is SO CHEAP. And coming from the queen of cheapskates this was very necessary. If you've never heard of EL wire, it is this brilliant battery powered wire that is easy to form and can be secured simply by glueing it in place. There are a lot of different ways to go about making this. I married two DIY's I watched into one. I'm not going to lie this is not super easy, but it is also not incredibly difficult; it just takes a great deal of patience (which I can sometimes lack). 

First, cut your drywall sheet (or wood sheet) down to the size you want (mine is roughly 15"x25"). You will then need to cute your fabric down to the right size; leave about two inches on each side. You can secure it by stapling in the back. 

Next, you'll trace the word or phrase you want onto the fabric. I free-handed this part; but, you are welcome to use a specific font if you wish. 


The next part is the hardest part to put into words, and to be quite honest, it depends a great deal on the word or phrase you will be creating. You will need to create an entry point using a drill (mine started at the base of the first "r" in ramblings. Weave the EL wire all the way through that hole and secure the battery pack in the back. Then form each letter using the EL wire securing as you go. I used hot glue; however, I recommend the super glue route to avoid the "strings" hot glue creates. Along the way, you will have to create more entry points but you'll know when to do that. The 9ft was just enough for my phrase so you may need to purchase more. 

And that's it! I will definitely saw it is better to start with a simply word before jumping in to the full phrase. That way, you can get the hang of it. If you end up making this on your own, tag my on Instagram @rinlongo, so I can see the creations you make. 
Share
Tweet
Pin
Share
No comments


What better way to snap my blogging drought than with a fun (and colorful) DIY. I am a sucker for a simple and easy to execute projects; especially when is involves pink paint! I've had my eyes on some pink letter boards for awhile now, but could never get over how damn expensive they were. This is when the DIYer in me takes over. 

This project is so easy; you only need four things (five if you want white letters like me) to accomplish it.

- White letter board (found mine for $10 here)
- Acrylic paint in the color of your choosing 
- Textile medium 
- Paintbrush 
- White spray paint (optional)

In a disposable cup, mix together your acrylic paint and textile medium. This allows the paint to be easier to work with and last longer. Next, using a larger paint brush, paint on the felt board with the mixture. Allow to dry and ta da, you are done! I preferred to have white letters, so I spray painted mine white. This step isn't necessary but equally as easy. 

Share
Tweet
Pin
Share
No comments


I've been dying to try this DIY for quite awhile now, and it is so simple; I don't know why it took me so long to test it out. The best part? You can try this out with any style of shoe! See below for the full deets.


What You Need: 

- Yarn 
- Shoes (I snagged mine at Goodwill)
- Hot glue gun

Using your fingers, create your desired size pom pom. I created a medium sized pom pom. Small tip, if you create a larger pom pom you can trim it down so it looks more compact once you reach your desired size. Once you've created your pom poms (I made six), you will heat a hot glue gun to help attach them to your shoe. And voila! That is it. Doesn't get much easier than that! 


Share
Tweet
Pin
Share
1 comments

Longtime followers of this blog know that there are two things that I love in life: Goodwill and a DIY project, and when I can combine the two together, life just clicks. I scored this Calvin Klein denim skirt at 50% off day for a mere $3.00 and smelled the perfect DIY project. 

In it's original form, this skirt was long and boring. I have been inspired frayed denim for awhile and felt that this skirt would be the perfect opportunity to try it out. I watched this tutorial and got straight to work. Fair warning, this is a long process, but the final product is well worth it! 

Share
Tweet
Pin
Share
6 comments
Older Posts

About me

About Me

Hi there! My name is Rin, and I'm the face of Ramblings with Rin: a fashion and lifestyle blog for the budget conscious. With every post, I hope to provide tips and guidance to achieve great personal style on a budget. Thanks for following along!


Follow Along

  • facebook
  • twitter
  • instagram
  • pinterest
  • bloglovin
  • email

currentlycraving

doityourself

currentlycraving

Created with by ThemeXpose | Distributed by Blogger Templates